Menu
How to Cut Window Tinting Film with GCC Vinyl Cutter?

Introduction
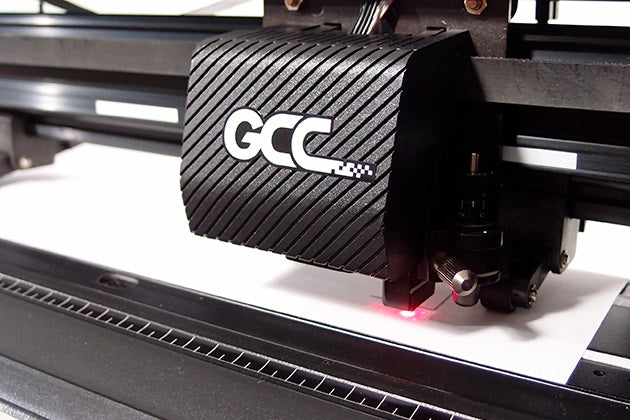
Window film cutting is an essential process in the window tinting industry. Achieving precise and efficient cuts is crucial for ensuring high-quality installations. In this article, we will explore the use of the GCC Vinyl Cutter, specifically the GCC Jaguar and Puma Series Cutting Plotters, in combination with the TintTEK 20/20 software for cutting window films. We'll discuss the benefits of using this equipment and the materials it supports and provide step-by-step instructions on how to cut window film effectively.
The Power of GCC Vinyl Cutter
The GCC Jaguar and Puma Series Cutting Plotters are renowned for their exceptional cutting quality, accuracy, and reliability. These cutting-edge machines are specifically designed for professional window tinting applications. Employing the GCC cutter can streamline your window film-cutting process, making it more efficient and cost-effective.
TintTEK 20/20: The Ultimate Window Tinting Plotter Software
To complement the GCC Vinyl Cutter, the TintTEK 20/20 software is ideal for professional window tinting. This comprehensive software offers a range of advanced features that enhance your cutting experience. With TintTEK 20/20, you can easily plot heat rejection films, architecture films, protection films, safety films, and even car stickers. This versatility opens up new opportunities for expanding your business and catering to a broader range of clients.
Advantages of GCC Cutter and TintTEK 20/20
1. Enhanced Efficiency
Gone are the days of manually cutting window films piece by piece. The GCC cutter's accurate tracking and perfect cutting quality significantly enhance production efficiency. With the combination of GCC Vinyl Cutter and TintTEK 20/20, you can experience a remarkable increase in productivity. This advantage is particularly valuable for experienced professionals seeking to handle more projects and maximize output.
2. Reduction in Material Waste
Traditional methods of cutting window films often lead to material waste due to the inherent inaccuracies of manual cutting. Utilizing the GCC cutter eliminates the risk of human error and minimizes material waste. The precise cutting capabilities of the GCC cutter ensure that each film is cut with utmost accuracy, resulting in reduced wastage and improved cost-effectiveness.
3. Space Optimization
Another significant advantage of using the GCC cutter is the elimination of the need for acrylic molds. The traditional process required stocking a considerable amount of acrylic molds, leading to increased storage space requirements. With the GCC cutter, you no longer have to store these molds, allowing you to optimize your workspace and make more efficient use of available resources.
4. Expanding Your Business
The GCC cutter is not limited to car window films. It can be seamlessly integrated into your business for cutting architecture films, protective films, and car stickers. This versatility enables you to diversify your offerings and tap into new markets. Whether you are an experienced professional or a beginner in the auto decoration industry, the GCC cutter, in combination with TintTEK 20/20, empowers you to expand your business horizons.
Step-by-Step Guide: Cutting Window Film with GCC Vinyl Cutter
We have prepared a comprehensive step-by-step guide to help you achieve the best results when cutting window film. Follow these instructions carefully to ensure a smooth and successful window tinting process:
1. Loading the Plotter
Start by loading your GCC plotter with the desired window film. Make sure to place the film side up, ensuring proper alignment within the plotter.

2. Cutting Process
Initiate the cutting process using the GCC cutter. Allow the plotter to complete the cutting operation. Once finished, the window film should be accurately cut according to your design.

3. Film Pattern Removal
Carefully remove the cut film pattern from the machine, ensuring that it remains intact. Place the pattern on a peel board to prepare it for the subsequent weeding process.

4. Window Preparation
Before installing the film, prepare the window surface. Begin by spraying a soapy water solution onto the window. Then, use a razor blade to scrape the window surface and ensure it is clean. Lastly, squeegee the window to remove any remaining impurities and create a suitable surface for film installation.

5. Release Liner Removal
Separate the release liner from the window film carefully. This will expose the adhesive side of the film, preparing it for installation.

6. Soapy Water Application
Thoroughly spray the entire adhesive side of the window film with the soapy water solution. This step helps to create a lubricating layer, allowing for easy positioning and alignment during installation.

7. Excess Film Removal (Weeding)
Gently remove any excess cut film from the pattern. This process, known as weeding, ensures that the film retains only the desired pattern, reducing waste and improving the overall quality of the installation.

8. Handling the Film
Handle the film with care, avoiding any contact with the adhesive side. Prepare the film for installation on the inside of the window.

9. Film Installation
Align the top edge of the film with the top of the window and gradually install it on the inside surface. Ensure proper alignment and smooth out any wrinkles or air bubbles using a squeegee or a similar tool.

10. Water Removal
Using the squeegee, remove excess soapy water solution from between the window film and the glass surface. Continue the process until all water is eliminated, leaving behind a pristine and flawless window tint.

Conclusion
Cutting window film with the GCC Vinyl Cutter, in combination with the TintTEK 20/20 software, revolutionizes the window tinting process. The impeccable cutting quality, enhanced efficiency, and reduction in material waste make this duo a perfect choice for both experienced professionals and beginners. Following the step-by-step guide in this article, you can achieve outstanding results in your window film-cutting endeavours. Upgrade your window tinting business today and enjoy the benefits offered by the GCC Vinyl Cutter and TintTEK 20/20 software.
- Choosing a selection results in a full page refresh.


