Menu

Ready to Take Your Print Business to the Next Level?
Large Format & Digital Printers
Contact Us Today For a Quote

Trending Top Sellers
$890/month NEW Mimaki 64" Hybrid – Complete Turnkey Package | UJ330H-160 Hybrid UV-LED Printer


$890/month NEW Mimaki 64" Hybrid – Complete Turnkey Package | UJ330H-160 Hybrid UV-LED Printer
From $133/month New Prestige R2 PRO 13.75" WITH CUTTER DTF Printer 110V A3+ with Bundle options


Sale


From $133/month New Prestige R2 PRO 13.75" WITH CUTTER DTF Printer 110V A3+ with Bundle options
- Price
- From $8.95
$99/Month - (FREE SHAKER) DTF x2 Epson Print Heads (110V) YINSTAR A3 13" DTF PRINTER


Sale


$99/Month - (FREE SHAKER) DTF x2 Epson Print Heads (110V) YINSTAR A3 13" DTF PRINTER
- Sale price
- $99
- Regular price
- $185
From $98/month - New Prestige R1 13" DTF Printer Bundle - Includes Prestige R1 DTF Printer, Startup Package and Compatible Machine Options


Sale


From $98/month - New Prestige R1 13" DTF Printer Bundle - Includes Prestige R1 DTF Printer, Startup Package and Compatible Machine Options
- Price
- From $8.95
$99/month - JAGUAR 70" AUTOMOTIVE SPECIAL EDITION PPF/TINT Cutter Plotter with Anti-Static kit and Tint Velvet Film.


Sale


$99/month - JAGUAR 70" AUTOMOTIVE SPECIAL EDITION PPF/TINT Cutter Plotter with Anti-Static kit and Tint Velvet Film.
- Sale price
- $99
- Regular price
- $145
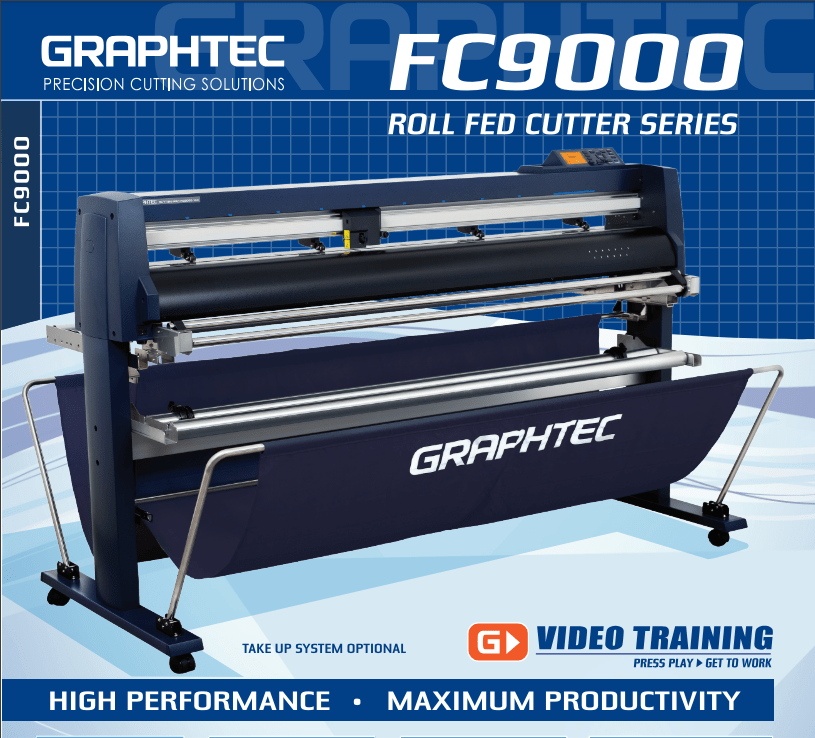
$165/MONTH NEW 64" Graphtec FC9000-160 For Automotive Professionals with 50 ft accurate tracking of Window Tint, PPF Film & Vinyl. Roll-fed Cutting Plotter

Sale


$165/MONTH NEW 64" Graphtec FC9000-160 For Automotive Professionals with 50 ft accurate tracking of Window Tint, PPF Film & Vinyl. Roll-fed Cutting Plotter
- Sale price
- $165
- Regular price
- $225
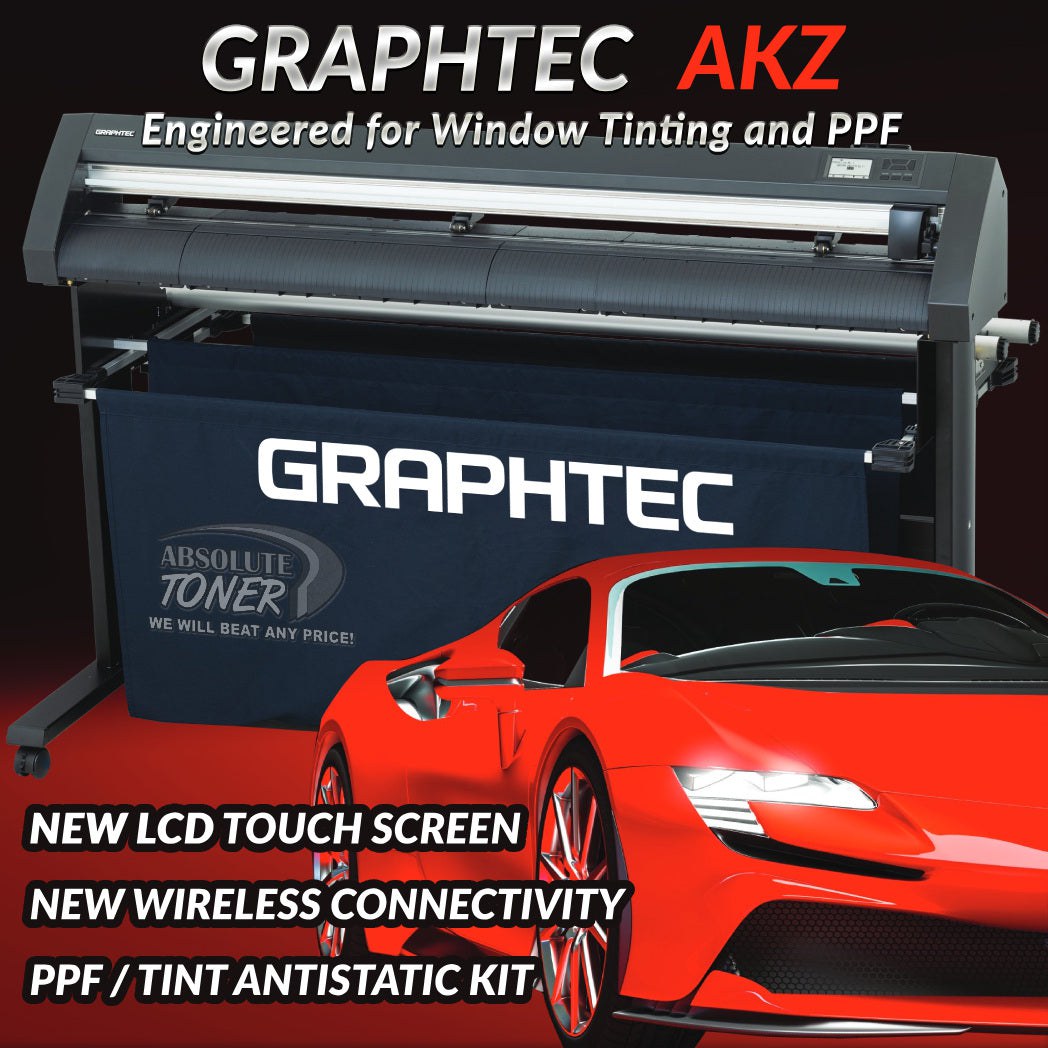
$99/month NEW 51" GRAPHTEC AUTOMOTIVE MODEL WINDOW TINT/PPF ANTI-STATIC KIT Stand, Basket

Sale


$99/month NEW 51" GRAPHTEC AUTOMOTIVE MODEL WINDOW TINT/PPF ANTI-STATIC KIT Stand, Basket
- Sale price
- $99
- Regular price
- $145
$95/month PLYTRONIX Pneumatic PRO 64” with Anti-Static System, Large Format Auto High-Speed Cold/Hot Laminator for Signs, Graphics, Banners, Prints & More


Sale


$95/month PLYTRONIX Pneumatic PRO 64” with Anti-Static System, Large Format Auto High-Speed Cold/Hot Laminator for Signs, Graphics, Banners, Prints & More
- Sale price
- $95
- Regular price
- $165
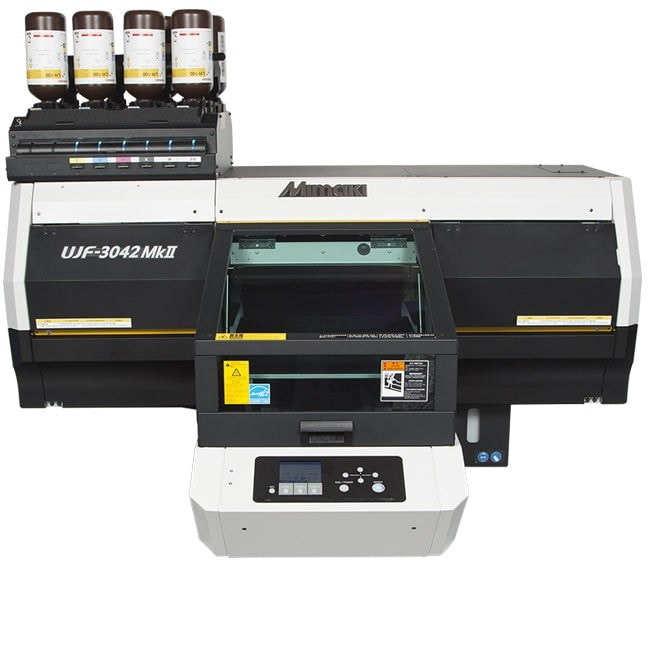
$249/Month Pre-Owned Mimaki UJF-3042MKII UV-LED Curable Flatbed Printer - REPO Excellent condition
Sale

$249/Month Pre-Owned Mimaki UJF-3042MKII UV-LED Curable Flatbed Printer - REPO Excellent condition
- Sale price
- $249
- Regular price
- $525
$495/month Mimaki 23.4"x16.5" UJF-6042MkII UV-LED Flatbed UV Printer - REPO LIKE NEW UJF-6042 MkII


Sale


$495/month Mimaki 23.4"x16.5" UJF-6042MkII UV-LED Flatbed UV Printer - REPO LIKE NEW UJF-6042 MkII
- Sale price
- $495
- Regular price
- $843
$50/month Plytronix Pneumatic Cold Semi-Automatic Applicator Laminator - Air Cylinder Roller – Ideal for Media lamination & Versatile Board Applications


Sale


$50/month Plytronix Pneumatic Cold Semi-Automatic Applicator Laminator - Air Cylinder Roller – Ideal for Media lamination & Versatile Board Applications
- Sale price
- $50
- Regular price
- $115
NEW 57" GCC AMERICA Expert II LX WINDOW TINTING/PPF/Vinyl Plotter EX-II LX Windows Tint Cutter With Contour Cutting.
![Absolute Toner [52"] New GCC Professional Expert II 52" Wide LX Vinyl Cutter Plotter With Aligning System For Contour Cutting Vinyl Cutters](//www.absolutetoner.com/cdn/shop/files/gcc-expert-ii-1_1_658735c6-5354-4ac6-b32b-155baab50410.jpg?v=1696875559)

Sale
![Absolute Toner [52"] New GCC Professional Expert II 52" Wide LX Vinyl Cutter Plotter With Aligning System For Contour Cutting Vinyl Cutters](http://www.absolutetoner.com/cdn/shop/files/gcc-expert-ii-1_1_658735c6-5354-4ac6-b32b-155baab50410.jpg?v=1696875559)

NEW 57" GCC AMERICA Expert II LX WINDOW TINTING/PPF/Vinyl Plotter EX-II LX Windows Tint Cutter With Contour Cutting.
- Price
- From $39.95
Yinstar A3 Multifunction UV-DTF Flatbed Printer with Epson Heads for Glass Bottles, Mugs, Phone Cases and more


Sale


Yinstar A3 Multifunction UV-DTF Flatbed Printer with Epson Heads for Glass Bottles, Mugs, Phone Cases and more
- Sale price
- $5,950
- Regular price
- $9,995
$366/month Mimaki UCJV300-160 64" Inch UV Light Curable Inkjet Printer And Cutting Plotter - Demo Unit


$366/month Mimaki UCJV300-160 64" Inch UV Light Curable Inkjet Printer And Cutting Plotter - Demo Unit
- Price
- $366
New Mimaki TxF300-75 31.5" DTF PRINTER (DIRECT-TO-FILM) Printer Dual Print Heads 1440dpi Print Resolution with optional Shaker


New Mimaki TxF300-75 31.5" DTF PRINTER (DIRECT-TO-FILM) Printer Dual Print Heads 1440dpi Print Resolution with optional Shaker
$136/Month New Miro 36 DTF Powder Shaker For Mimaki TxF150-75, TXF300, Epson SureColor G6070C, Roland TY-300i


Sale


$136/Month New Miro 36 DTF Powder Shaker For Mimaki TxF150-75, TXF300, Epson SureColor G6070C, Roland TY-300i
- Sale price
- $156
- Regular price
- $210
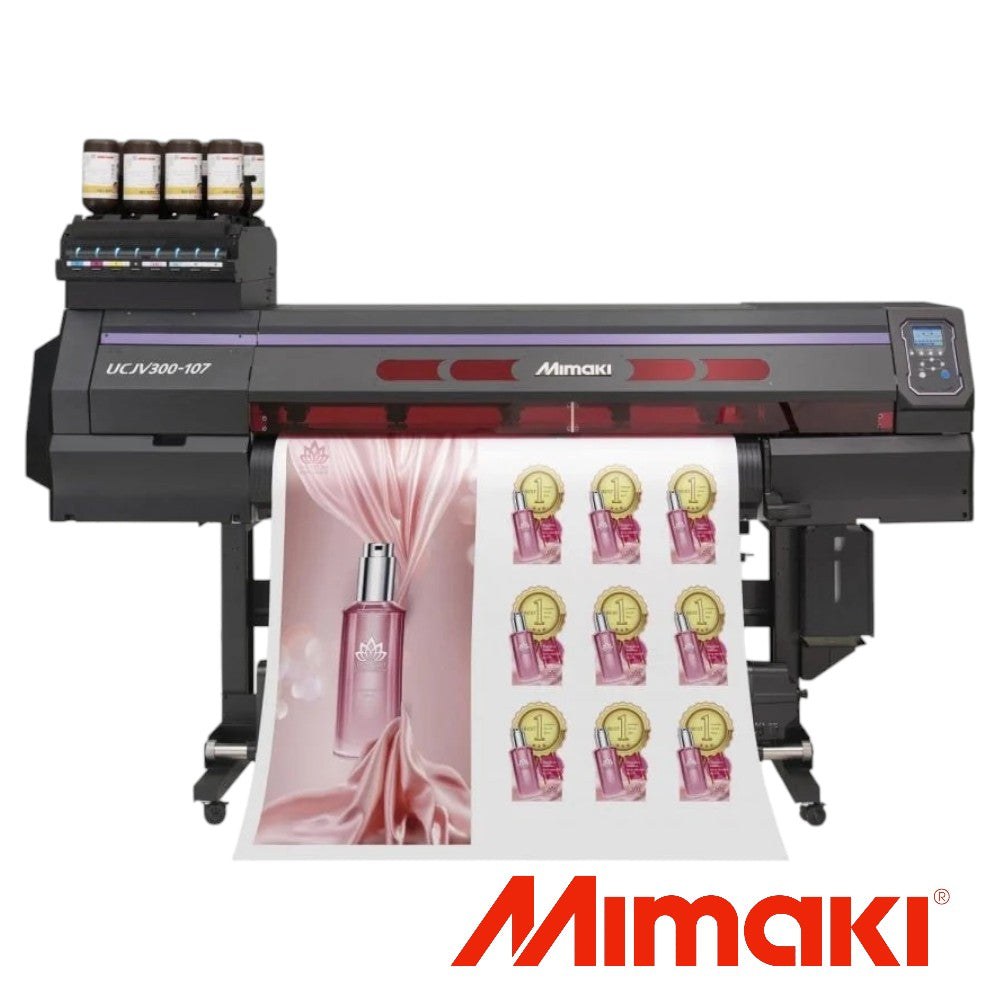
$247/month 42" Mimaki UCJV300-107 2 New Original Heads UV-LED Large Format Printer/Cutter (Print/Cut)

Sale


$247/month 42" Mimaki UCJV300-107 2 New Original Heads UV-LED Large Format Printer/Cutter (Print/Cut)
- Sale price
- $247
- Regular price
- $495
$285/month - PRE-OWNED Mimaki UCJV300-160 UV-LED 64 inch Wide Format Printer/Cutter (PRINT/CUT)


Sale


$285/month - PRE-OWNED Mimaki UCJV300-160 UV-LED 64 inch Wide Format Printer/Cutter (PRINT/CUT)
- Sale price
- $285
- Regular price
- $32,000
$398/month NEW DEMO UV 64" 1 YR WARRANTY Mimaki UCJV300-160 UV-LED 64 inch Wide Format Printer/Cutter (PRINT/CUT)
Sale
$398/month NEW DEMO UV 64" 1 YR WARRANTY Mimaki UCJV300-160 UV-LED 64 inch Wide Format Printer/Cutter (PRINT/CUT)
$472/Month – iMaxCan 8FT x 4FT UV Flatbed Printer with 3 NEW GEN5 heads| High-Precision Large Format Printing for Industrial Applications


$472/Month – iMaxCan 8FT x 4FT UV Flatbed Printer with 3 NEW GEN5 heads| High-Precision Large Format Printing for Industrial Applications
- Sale price
- $29,850
- Regular price
- $65,000
How to Set Up a Graphtec Plotter for PPF Cutting: A Step-by-Step Guide

Paint Protection Film (PPF) cutting demands exceptional precision, material handling, and software compatibility. That’s why professionals in the automotive protection industry rely on Graphtec plotters—especially the latest models like the CE8000-130 and FC9000-140. These machines are built to handle the unique challenges of cutting thick, flexible PPF film.
In this blog, we’ll walk you through the complete setup process for your Graphtec plotter, specifically for PPF applications. Whether you’re just getting started or want to fine-tune your setup, this guide ensures cleaner cuts, less waste, and smoother production.
Why Graphtec for PPF?
Graphtec is the industry standard for high-precision cutting in the PPF world. Here’s why:
- Advanced Registration Mark Sensor (ARMS) for contour accuracy
- Long-distance tracking for oversized hood and bumper templates
- Special PPF preloaded conditions on the CE8000-130
- Compatible with major PPF template software
- Reliable blade and holder options for thick film
Whether you’re a one-person shop or a high-volume installer, Graphtec offers consistent quality and workflow efficiency.
Step 1: Choose the Right Plotter Model
For cutting Paint Protection Film, you need a plotter that supports wide rolls and durable materials. Graphtec’s top PPF machines in 2025 include:
- Graphtec CE8000-130 – Purpose-built for PPF with factory-installed PPF condition settings
- Graphtec FC9000-140 – Premium model for heavier loads and advanced performance
Both offer media baskets, long roll support, and software integration for template-based cutting.
Step 2: Install and Connect Your Plotter
- Assemble the stand and media basket.
- Mount the PPF film roll securely on the rear holders.
- Connect to your computer via Ethernet (recommended) or USB.
- Install software:
-
-
Use Cutting Master 4 with Adobe Illustrator or CorelDRAW
-
Or Graphtec Studio if you don’t use design software
-
Tip: Cutting Master 4 gives you deeper control and integrates directly into design workflows.
Step 3: Load the PPF Film Correctly
Loading film accurately is critical when working with high-value material like PPF:
- Align film centrally using the plotter’s guides
- Make sure pinch rollers are placed outside the cut area
- Use Roll 2 Edge or Roll 3 Edge mode to handle film tracking
- Keep tension consistent to avoid skewing
Step 4: Use the Correct Blade and Holder for PPF
PPF films are thicker and tougher than standard vinyl. You’ll need:
- Graphtec CB15U 45° blade – Ideal for clean cuts in thick materials
- PHP33-CB15N-HS blade holder – Stable and adjustable for consistent pressure
Set the blade so that just a tiny tip is visible—enough to cut the film but not the liner. Always test before production.
Step 5: Dial In Force, Speed, and Offset
Correct cut settings are essential for smooth edges and clean weeding.
Start with:
- Cut Force: 22–28 (adjust per brand)
- Speed: 10–20 cm/s
- Offset: Typically 0.30mm for CB15U blades
- Acceleration: Low-to-medium for control on curves
Brands like XPEL, SunTek, and 3M may require slight tweaks.
Step 6: Calibrate ARMS for Contour Accuracy
If you’re working with printed PPF templates or registration-mark-based cuts:
- Activate ARMS via the control panel or software
- Ensure lighting is even and marks are clean
- Use the auto-detection function for best results
- Save your calibrated setup as a Condition for future use
This step ensures perfect cut-to-print alignment.
Step 7: Use PPF Template Software
To streamline your cutting, most installers use template libraries such as:
- XPEL’s DAP
- 3M’s Pattern and Solutions Center
- PremiumShield Cut Studio
- Core PPF software
Export templates to vector format (.AI, .EPS, .DXF), open them in your design program, and send to the Graphtec plotter via Cutting Master 4 using your saved settings.
Step 8: Test Cut and Final Check
Before running a full job:
- Perform a test cut on a small section of film
- Confirm the cut goes cleanly through the film but leaves the liner untouched
- Watch for corners lifting, uneven depth, or film drag
If all looks good, you’re ready to go.
Bonus Tips for Clean PPF Cuts
- Change blades regularly – PPF dulls blades faster than vinyl
- Avoid overcuts – Sharp corners can lift during installation
- Use a media basket – Keeps film clean and avoids dragging
- Secure longer cuts – Apply light tension on large panels
Final Thoughts
Setting up a Graphtec CE8000-130 or FC9000-140 for PPF cutting is straightforward once you know the key steps. With the right tools, correct film loading, and precise cut settings, you’ll eliminate waste, increase productivity, and deliver flawless PPF protection every time.
Need Help Getting Started?
We offer support, training, and customized bundles for Graphtec plotters designed specifically for PPF professionals. Reach out today to elevate your cutting workflow.
- Choosing a selection results in a full page refresh.